How to Install Your CPR Sign: A Simple Guide

Ensuring your CPR sign is properly installed is crucial for both safety and compliance. At Silux, we offer multiple installation options to suit different surfaces and preferences. Whether you're fixing your sign to a wall, fence, or glass surface, our easy-to-follow guide will help you get it done efficiently.
1.Using Suction Caps for Glass Surfaces
Materials Needed
- Suction caps (included with the sign or purchased separately)
- Clean cloth
Steps
1. Clean the Glass: Thoroughly clean the glass surface where you will be attaching the sign. Ensure it’s dry and free from any residues.
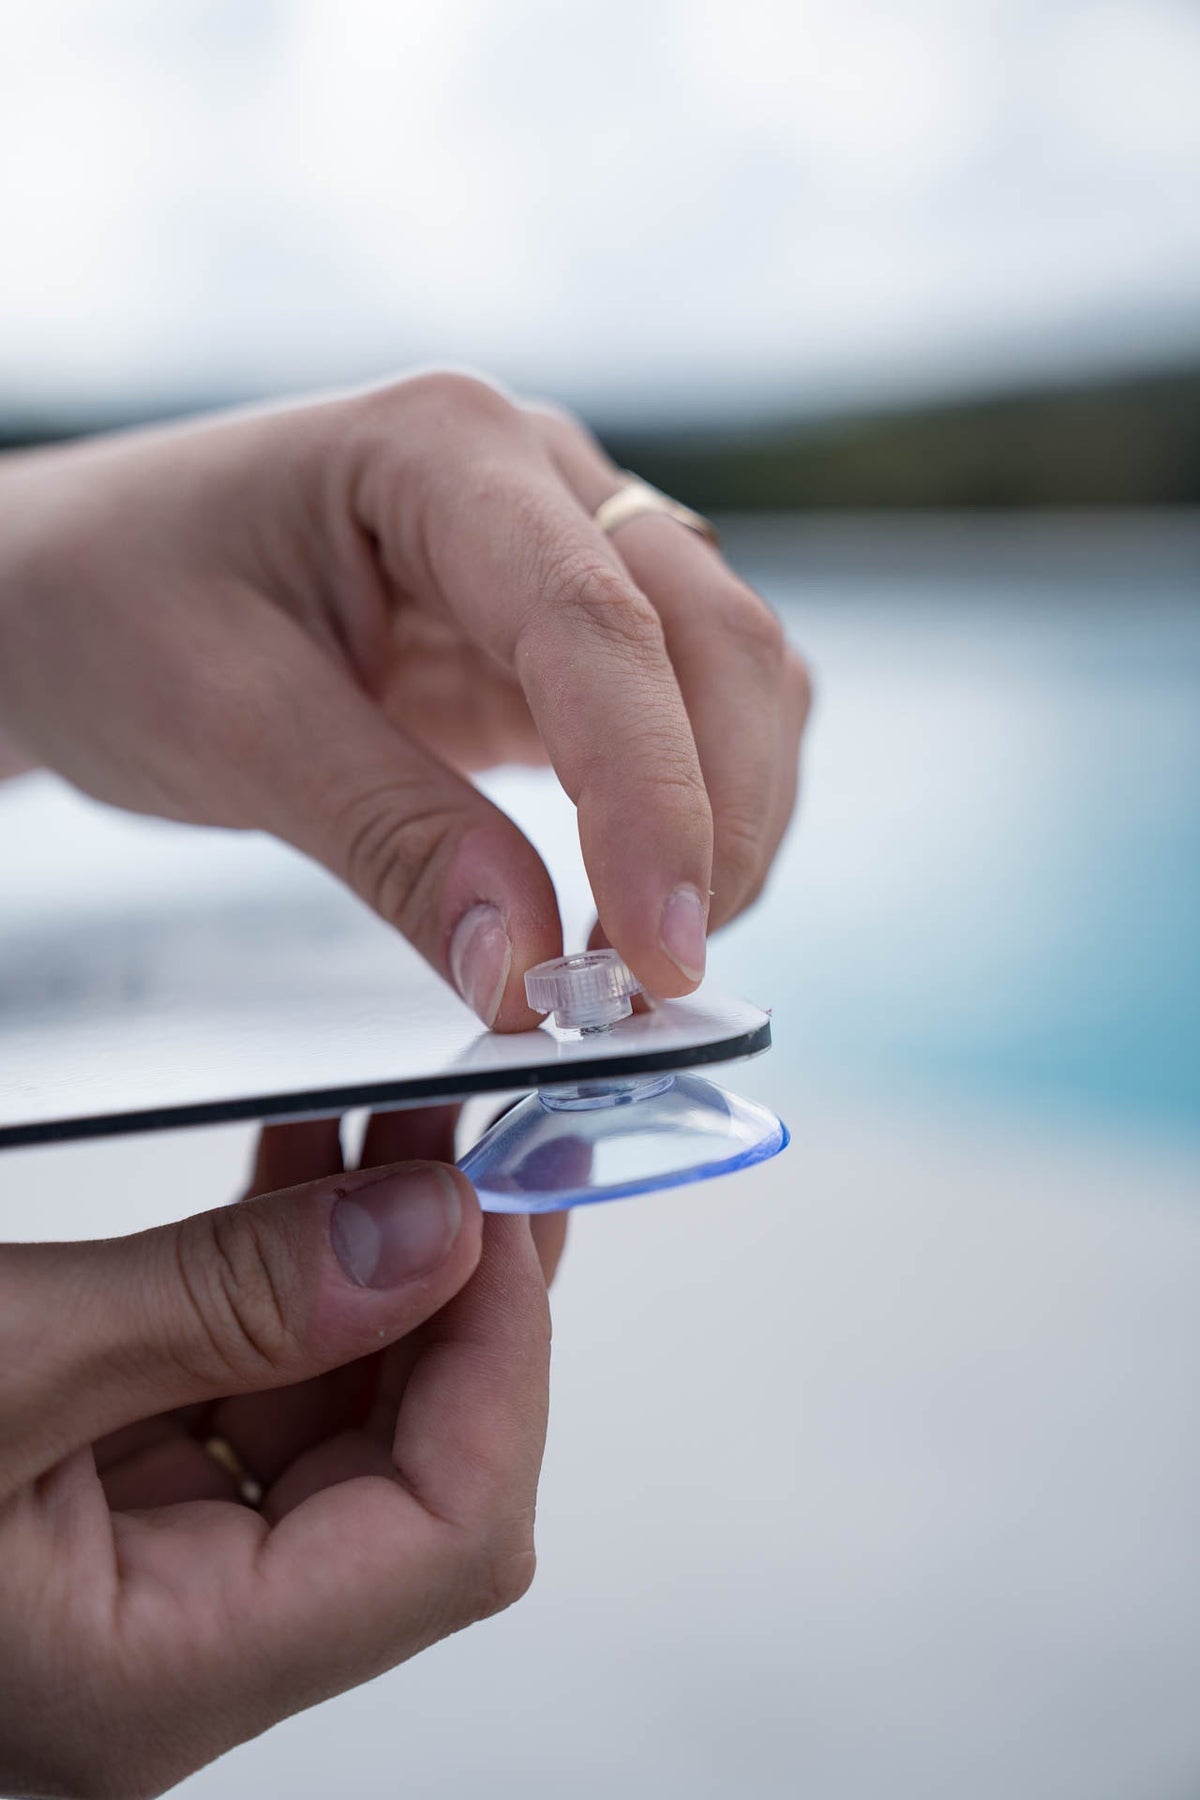
2. Attach Suction Caps: Position the suction caps in the pre-drilled holes of the sign. Press firmly to secure them in place.
3. Mount the Sign: Align the sign with the glass surface and press the suction caps firmly against the glass. Ensure all caps are securely attached.
4. Adjust if Necessary: Check the alignment of the sign. Adjust as needed to ensure it’s straight and level.
2. Direct Fix to a Solid Surface
Materials Needed:
- Screws (not included)
- Screwdriver or drill
- Wall anchors (if needed)
Steps:
1. Select the Location: Choose a flat, solid surface such as a wall or fence. Make sure it's visible and accessible.
2. Mark the Holes: Position the sign where you want to mount it. Use a pencil to mark the screw holes through the pre-drilled holes in the sign.
3. Drill Holes: If you’re mounting on a wall, drill holes at the marked spots. For fences or other materials, ensure the screws are appropriate for the surface.
4. Install the Screws: Insert wall anchors if necessary, then drive the screws into the drilled holes, leaving a small gap for the sign to hang.
5. Mount the Sign: Align the sign with the screws and hang it. Ensure it’s level and securely fastened.
3. Using Double-Sided Heavy Duty Tape
Materials Needed:
- Double-sided heavy duty tape (ensure it’s suitable for outdoor use)
- Scissors or a utility knife
- Clean cloth
Steps:
1. Prepare the Surface: Clean the surface where the sign will be applied, making sure it’s dry and free of dust or debris.
2. Cut the Tape: Cut pieces of tape and apply them to the back of the sign, placing them around the edges and center.
3. Peel and Stick: Peel off the backing from the tape. Carefully position the sign on the surface and press firmly to ensure it sticks well.
4. Check Adherence: Make sure the sign is securely attached and no edges are lifting.
Final Tips
Double-Check Compliance: Make sure your installation meets local regulations and compliance standards.
Weather Considerations: For outdoor installations, ensure the materials used (tape or suction caps) are suitable for various weather conditions.
Regular Checks: Periodically check the installation to ensure everything remains secure, especially in high-traffic areas or extreme weather conditions.
If you have any questions or need further assistance with your installation, feel free to contact us. At Silux, we're here to help make your pool safety signage both effective and stylish!


